Beta release of Synthor: digital modular synthesizer for AudioCubes
2015-11-01
In this blog post I’d like to update you on what I’ve added to SYNTHOR over the past weeks, and make a new build available for MacOSX and Windows. Scroll down to learn more about what’s new and where to download the build.
In this new build, I’ve added a bunch of new processors and fixed a bunch of bugs. I then used this build in a few demos (see the video from last newsletter and the ones in the upcoming newsletters). I also used the build in live demos in Berlin the past week so it’s pretty stable.
Among the new processors, there is a comb filter and a sampler module, and a new effects section in the output module. Among the new features are quantization in the step sequencer module, step/gate length, and the ability to clock the step sequencer using arbitrary signals. I’ve also made the sequencers run independently with the option to sync them, and you can also sync them to MIDI clock signals and divide the clocks of the sequencers. The envelope generator now also has an invert option and the wavetable oscillator can load a different wavetable file per cube panel.
Below you can see a few screenshots of the new processors, the new effect section in the output cube and the updates to the step sequencer.
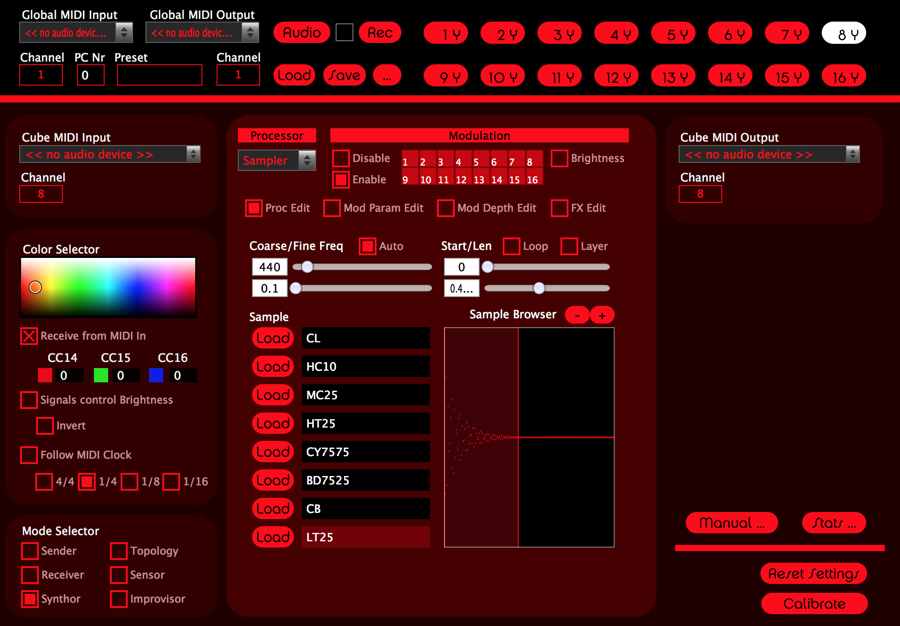
The sampler allows you to load 8 samples, and then trigger these samples using a signal from the step sequencer, for example. Each level of the signal corresponds to a different sample slot, so you can trigger samples using any signal you want. The step sequencer has quantization built in (adjustable) so that helps to quickly program patterns. What’s really interesting is to run the sampler in loop mode, and then also layer the samples. This will mix all 8 samples together and then loop them. You can then use the start and length settings to turn the layer into a complex waveform. If you switch off the auto-frequency setting, you can set the frequency of oscillation/looping using the frequency sliders (fine and coarse). You can get some really amazing textures using the sampler. I’ve used a TR-808 set myself and it’s really interesting you can get completely new pad-like sounds from a percussion kit like that.
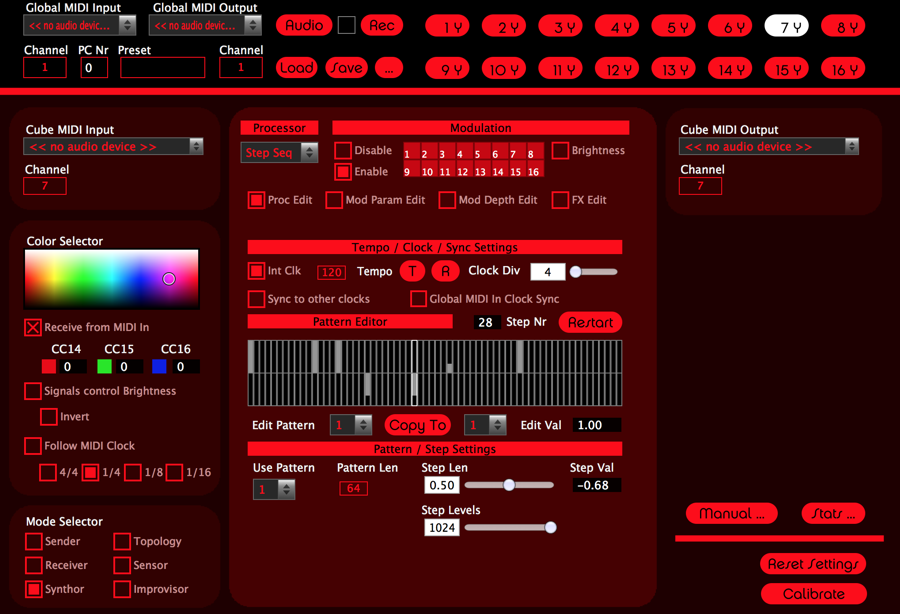
In the step sequencer, you can now use an internal clock or drive the sequencer using an arbitrary signal as a clock. For example you can use an LFO to drive it. You can also divide the clock and limit the sequence length (default is 64 steps). You can also sync the step sequencers together or let them run independently and they can sync to MIDI clock signals. Finally you can set the gate/step length and you can quantize the step sequence (i.e. limit it to 4 values above and 4 values below zero). The step sequencer now always outputs an AC signal and no longer a DC signal like in the first builds of SYNTHOR. I’ve also updated the code such that each cube panel / step sequencer instance has its own 4 patterns, and the patterns are now no longer shared between step sequencers, which makes it more flexible and easier to understand.
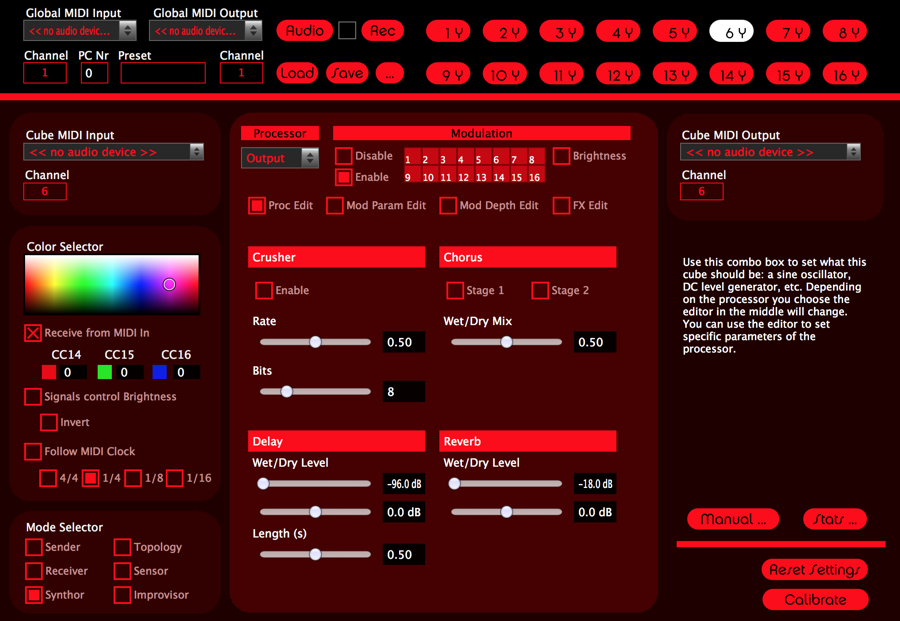
In the output cube there is now an effects chain, featuring a bit crusher/sample and hold, chorus, delay and reverb section. The 4 effects are linked together in that order for the moment and the effects can be individually switched on or off. The chorus, delay and reverb have wet/dry mixes. Of course, if you have multiple output cubes, each of these can have different settings for the effect chains since it is specific to the output cube. So you can different mixes of signals and different effect configurations this way.
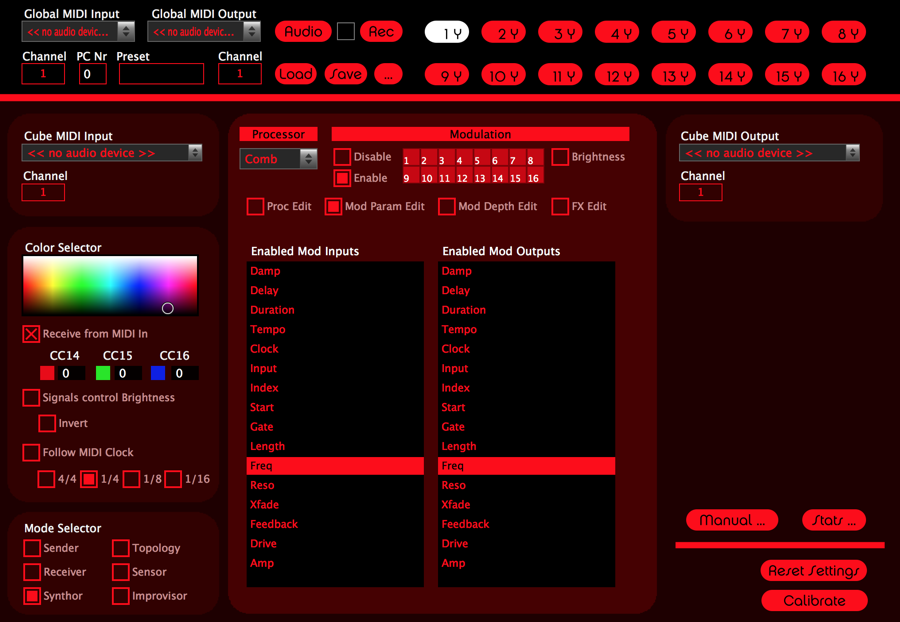
I haven’t touched on this much in previous newsletters, but the way SYNTHOR works, is by specifying which settings of the cube processors can be modulated, and which settings the processors will modulate. For example, you can have two oscillators A and B, and they can be configured to modulate each other in frequency, but you can also configure them such that only A will modulate the frequency of B, or B will only modulate the frequency of A. You do this using the “mod param edit” screen, where you can set which parameters the cube/processor will modulate (on the right hand side) and which parameters of the processor can be modulated (on the left hand side). This way, if you put two cubes next to each other, the system knows how to route the signals. So to make it even more clear, you don’t patch yourself, patching is done automatically. BUT you can specify which routings / patchings you want, and then go crazy and try all sorts of combinations of processors, and it will keep working, and you don’t have to think “can I connect this with that?”. It literally makes patching in a modular synthesizer 10 times easier and fool proof without reducing the possibilities and flexibility.
Do you have any questions? Send me an email at bert@percussa.com and I’m happy to help out. You can download the new build (BETA) of synthor for Mac OSX and Windows in our download section.